You are comparing two things that look the same but are not: a harness that rubs because it is cheap, and a harness that rubs because it does not fit. The first you can replace for $15. The second you can fix in ten minutes with a measuring tape — and if you do not, a $90 harness will leave the same raw patches as a $10 one.
Across years of fitting harnesses on dogs, chafed chests and bald armpits often show up more from expensive, well-padded harnesses than from basic nylon models. The padding is not the problem. The fit is. Here is how to tell the difference, fix the cause, and keep your dog’s skin intact through every season.
Myth #1: “The Fabric Is Too Rough, So I Need More Padding”
The most common assumption I hear is that chafing comes from abrasive material — so owners buy thicker, softer padding and the problem gets worse.
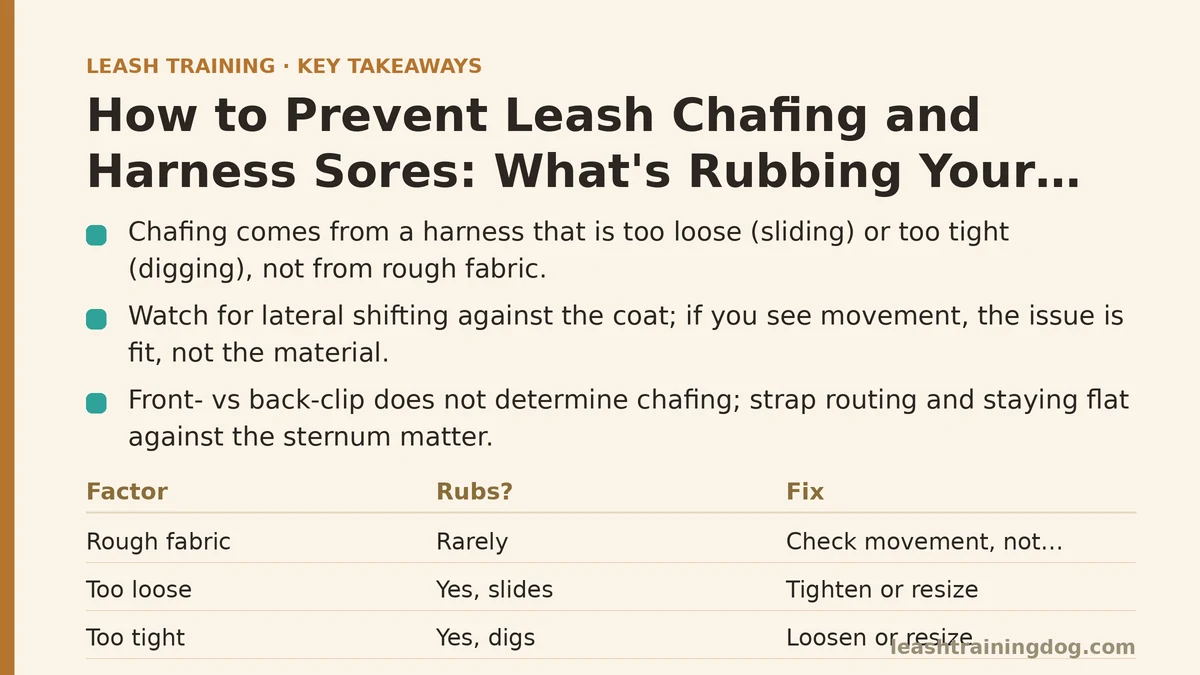
Reality: Rough fabric is rarely the culprit. Chafing happens when a strap moves against the skin under pressure. The pressure comes from a harness that is either too loose (sliding back and forth) or too tight (digging into a fixed spot). Padding does not stop movement — it just softens the friction until the skin is already raw. A well-fitted flat nylon strap moving less than a centimeter will cause zero irritation. A plush-padded harness shifting two centimeters will abrasively rub a sore within a single long walk.
The test: Run your hand along the inside of the harness where it touches your dog. If the fabric is smooth to your palm, the material is not the issue. Watch the harness move as your dog walks. If you see lateral shifting — side-to-side sliding against the coat — you have a fit problem, not a fabric problem.
Myth #2: “Sores Only Happen on Dogs with Sensitive Skin”
Some owners dismiss chafing as a breed-specific quirk — “my dog just has delicate skin, nothing I can do about it.”
Reality: Skin sensitivity lowers the threshold, but it does not cause chafing. The cause is mechanical: repetitive friction in a high-motion area. Two places on the dog’s body are most at risk: the armpits (where the front legs swing against the chest strap) and the sternum (where the front clip or chest plate sits). Every dog moves these areas on every step. When the harness allows even small movement in those zones, the friction compounds — 5,000 steps per walk times 6 millimeters of slide equals a lot of abrasion.
Breeds with short coats and less natural padding — Boxers, Greyhounds, Dobermans, Whippets — show the damage sooner. But the same sores can appear on thick-coated Labs and Golden Retrievers, hidden under the fur until the owner notices a bald patch or a flinch when touching the chest. The fix is identical regardless of coat type: stop the movement, not the sensitivity.
Myth #3: “A Front-Clip Harness Causes More Chafing Than a Back-Clip”
Because front-clip harnesses redirect pulling force, some owners assume the chest strap must work harder and therefore rub more.
Reality: The clip position does not determine chafing — the strap routing does. A front-clip harness with a properly positioned chest strap that sits flat against the sternum and does not ride up into the armpit will cause zero rubbing. A back-clip harness with a belly strap that slides forward into the leg pit will chafe on a dog that never pulls at all. The mechanical action of the clip is irrelevant to skin health; what matters is whether every strap stays where it was designed to sit.
In practice, front-clip harnesses are more likely to chafe because their chest straps are positioned higher and closer to the armpit, which is a harder area to fit correctly. But that is a fit challenge, not a design flaw. If your front-clip harness rubs, the fix is adjusting the chest strap lower and tightening the belly strap — not abandoning the clip type.
The Four-Step Fix That Stops Chafing
Work through these steps in order. Each one takes under five minutes and together they resolve the vast majority of harness-related skin issues.
Step 1: Measure the Dog, Not the Harness
Most sizing guides ask for chest girth, but the measurement that matters for chafing is the distance between the front legs — the width of the chest at the armpits. A harness that fits around the ribcage but is too wide between the legs will pinch and move upward with every step.
How to measure: Use a flexible tape. Place it at the widest point of your dog’s chest, just behind the front legs. Record this number. Then measure the distance between the front legs at their attachment point to the body — this is your “leg gap.” Compare both numbers to the harness manufacturer’s sizing chart. If the leg gap measurement is not listed, choose the size that matches chest girth and check the strap adjustability for the leg gap separately.
Step 2: Check the Two-Finger Rule — But Specifically at the Legs
The standard fit check — two fingers under any strap — is a good starting point, but it misses the leg area. A strap can fit loosely around the ribcage and still be too tight in the armpit, where skin is thinner and the leg swings hard.
Run your fingers under the straps where they pass behind the front legs. You should feel a clear gap — not just tight contact. If your fingers meet resistance, loosen the belly strap and adjust the chest strap higher or lower to redistribute the pressure. The goal is that each strap sits against the body without either digging in or floating free.
Step 3: Watch for Movement During the First Hundred Steps
A harness can fit perfectly while the dog stands still and begin shifting within a few strides. Take your dog for a short walk and watch the harness at the leg joint specifically.
What to look for: The chest strap should stay in one place. If it slides toward the front leg pit, tighten the belly strap. If it rides up toward the throat, loosen the chest strap and tighten the girth strap. If the entire harness rotates around the body, the fit is too large — step down a size and re-check.
Step 4: Add a Barrier for Healing Skin
If your dog already has a sore spot, do not continue walking them in the harness until the skin has fully healed. Use a plain flat collar with a front-clip leash attachment for a few days, or switch to a head collar if needed. Once the skin is intact, apply a thin layer of dog-safe balm (zinc-free, fragrance-free) to the area before the next walk to add a protective barrier. Reapply after the walk.
Do not use petroleum jelly — it traps moisture and softens the skin, making it more prone to chafing. A breathable wax-based balm absorbs quickly and protects without leaving a greasy layer.
When the Fix Is a Different Harness
If you have adjusted the fit and the chafing persists for more than a week, the harness shape itself is wrong for your dog’s body type. Some dogs have a narrow chest with a deep sternum; others are barrel-chested with a wide leg gap. No amount of adjustment fixes a harness whose proportions do not match your dog’s proportions.
What to look for instead: A Y-front harness (two straps that meet at the chest, leaving the armpits open) works best for deep-chested breeds. A vest-style harness with a wide, curved chest panel distributes pressure more evenly for barrel-chested dogs. Avoid harnesses with a single straight strap across the chest for any breed with a prominent sternum — that strap will always migrate into the armpit.
The cost of switching is lower than the cost of repeated sores: a $25 harness that fits correctly outperforms a $70 harness that rubs. Measure first, then buy.
Quick Reference: Fit Problem vs. Harness Problem
| Sign You See | Likely Cause | Fix |
|---|---|---|
| Strap slides toward the leg pit within 10 steps | Loose belly strap | Tighten belly strap, re-check leg gap |
| Harness rides up toward the throat | Chest strap sits too high | Loosen chest, tighten girth strap |
| Harness rotates around the body | Size too large | Step down a harness size |
| Sore at the sternum, no obvious movement | Strap too tight at the chest | Loosen chest strap, check two-finger rule |
| Chafing persists after all adjustments | Harness shape mismatch | Switch to Y-front or vest-style design |
| Skin red after one walk, smooth when not walked | Normal friction, no padding | Add wax-based balm, re-check fit before walking |
The Bottom Line
Chafing is a symptom of movement, not a verdict on your harness. Measure the leg gap, check the straps at the armpits, watch the first hundred steps, and add a barrier only if healing skin needs protection. You will spend ten minutes once and a handful of walks confirming the fix — and you will not be buying a replacement harness every two months because the previous one rubbed your dog raw.
The one mistake that keeps people in this loop is skipping the measurement and jumping to a new purchase. Take the tape measure first, and you will know within a single walk whether the harness stays put or needs to go.
What harness are you using right now, and where on your dog’s body have you noticed rubbing? Tell me the brand and the sore location, and I will tell you the first adjustment to try.
Related guides: Front Clip vs Back Clip Harness: Which is Better for Your Dog?, Best Harness for Dogs That Pull: Top 5 Compared After Real-World Testing, and Choosing a Puppy’s First Leash and Collar: The Professional’s Step-by-Step Guide.