Say you are standing in a narrow fourth-floor hallway at 7:40 a.m., coffee in one hand, leash in the other, and your dog has just spotted a neighbor rounding the corner with a stroller. The elevator door is eight meters away. Your dog surges forward, the leash goes taut, and the neighbor flattens against the wall while you apologize for the third time this week.
Apartment living compresses every leash-training problem into a tiny space. Outdoors, a pulling dog has room to arc, slow down, and recover. In a hallway 1.2 meters wide, there is nowhere to go. In an elevator that holds four people and one dog, a single lunge is a safety issue for everyone inside.
The good news is that apartment etiquette is a trainable skill, and it breaks down into a handful of specific behaviors you can rehearse in ten-minute sessions. Below are the myths that make hallway walks harder than they need to be, paired with what typically works instead.
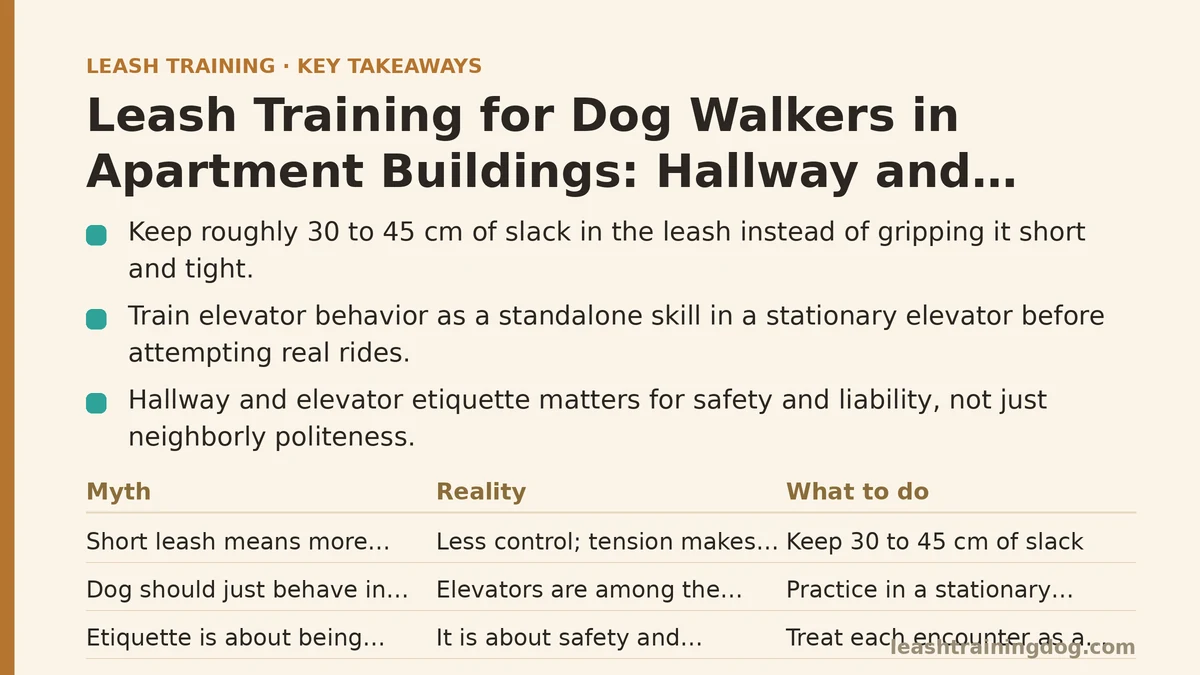
Myth vs. Reality: The Beliefs That Cause Most Hallway Problems
Most apartment leash trouble traces back to a small set of assumptions. Each one sounds reasonable. Each one tends to produce the opposite of the intended result.
Myth 1: “A short leash means more control”
Reality: A leash gripped short and tight at the handle gives you less control, not more. With no slack, every forward step your dog takes hits the collar or harness as a sudden jolt, and a dog that feels constant tension tends to lean into it.
What to do instead: Keep a small loop of slack in the leash — roughly 30 to 45 cm of give — and hold the handle in the hand closest to your body, with the leash crossing in front of your hip rather than behind your back. You want the leash to be a communication line, not a rope in a tug-of-war. In hallways, a 1.2 to 1.5 meter leash is typically the right length; anything longer drags on the floor and catches in doorways.
Myth 2: “My dog should just behave in the elevator because it’s a small space”
Reality: Elevators are one of the hardest environments a dog will encounter in daily life. The floor moves or vibrates. Strangers enter at close range. Doors open unexpectedly. Sounds echo. Nothing about the setting is calming, and expecting calm without rehearsal usually ends in a stressed dog and an apologetic owner.
What to do instead: Train elevator behavior as a standalone skill, away from the pressure of an actual commute. Stand in a stationary elevator with the doors held open during a quiet hour, reward your dog for standing still beside you, and repeat for three or four short sessions before attempting a real ride. A dog that has practiced “stand at my left side, doors are just doors” twenty times will handle a busy morning elevator far better than one meeting the situation cold.
Myth 3: “Etiquette is about being polite to neighbors”
Reality: Politeness is a side effect. The real reason hallway and elevator etiquette matters is safety and liability. A dog that lunges in a tight corridor can knock over a child, tangle a stroller, or startle someone into dropping groceries. In many buildings, repeated complaints about a dog in common areas can lead to lease conditions or fines — commonly in the $50 to $250 range depending on the building’s rules.
What to do instead: Treat every hallway encounter as a training rep with a safety margin. That means keeping your dog on the same side of the corridor as you, positioning yourself between your dog and oncoming traffic when possible, and never assuming the other person will move.
Myth 4: “If my dog is friendly, close contact is fine”
Reality: Not every neighbor wants a dog approaching them, and not every dog wants to greet every stranger. Nose-to-nose greetings in a confined hallway are a common trigger for snapping, even in generally social dogs, because there is no escape route for either animal.
What to do instead: Default to no contact unless the other person explicitly asks and your dog is calm. A greeting between two dogs should happen outdoors, on loose leashes, with room to disengage — not in a 1.2-meter corridor.
The Apartment Walk Checklist: Before You Open the Door
A large share of hallway incidents happen in the first ten seconds, before the walk has even started. Run through this list every time you leave:
- Leash on and clipped before the door opens. Not in the hallway. Not in the doorway. Inside, with the door closed.
- Treats in a pocket you can reach with your free hand. Aim for five to ten small, high-value treats per outing in the early weeks.
- Your dog positioned on one side — pick a side and stay consistent. Left side is the common default. Consistency is what makes the positioning automatic later.
- A quick “wait” at the threshold. Hand on the door, dog standing still, then release. This single habit prevents most door-bolting incidents.
- Phone away. You need both hands and both eyes for the first twenty meters.
If your dog cannot hold a stationary “wait” at the door for three seconds, that is the first skill to train — before any hallway work.
Hallway Rules: Moving Through Shared Space
Hallways are the highest-frequency encounter zone in any building. Here is how to handle them.
Passing a neighbor head-on
If the corridor is wide enough for two people to pass comfortably: shorten your leash slightly, move to the far side, and keep walking at a steady pace. Do not stop and let the dog stare. Forward motion with a loose leash is the goal.
If the corridor is narrow or the neighbor has a stroller, cart, or another dog: step into a doorway alcove or turn your dog to face the wall and stand still while the other person passes. Ask your dog for a “sit” or “stand” and reward the moment they hold position. This is a five-second maneuver, and it prevents the tangled-leash collision that tends to happen when both parties try to squeeze past.
Passing a neighbor walking the other direction with a dog
Two dogs approaching in a hallway is the single most common flashpoint. Use this decision branch:
- If your dog notices the other dog and stays under threshold (ears forward but body loose, leash still slack): keep moving, keep your body between the dogs, and reward calm passing.
- If your dog fixates, stiffens, or the leash goes taut: stop, turn, and walk the other way for ten to fifteen steps, then re-approach at a greater distance. Do not drag your dog past a trigger at close range — that repetition teaches exactly the wrong lesson.
- If the other owner is struggling with their dog: give them space rather than closing the gap. Wait at the far end of the corridor or take the stairs.
The stairwell option
Stairs are often calmer than elevators for reactive or excitable dogs, but they carry their own risks. Keep your dog on the inside of the turn, use a short leash, and teach a “slow” cue for descending. If your building has more than four floors, stairs are a training tool rather than a daily replacement for the elevator.
Elevator Etiquette: A Step-by-Step Protocol
Elevators reward preparation more than any other shared space. The sequence below is the standard approach and works for most dogs once practiced.
- Wait at least 1.5 meters back from the doors. This gives anyone exiting room to step out without meeting your dog face-first.
- Ask before entering if the car is occupied. A simple “mind if we join?” gives the other person a chance to decline, and it gives you a read on whether the car is calm enough.
- Enter last, position your dog in a corner or against a wall, and stand between your dog and the other passengers. Facing the doors with your dog beside you, not in front of you, is the standard placement.
- Ask for a “sit” or “stand” and reward quietly. A dog holding a position has far less opportunity to lunge than a dog free to roam.
- Keep the leash short but not tight — around 60 to 80 cm of visible leash — and loop the handle over your wrist so a sudden movement cannot pull it free.
- Exit first if you are nearest the doors, last if you are at the back. Never squeeze past another dog to get out.
- If another dog is already inside and your dog is reactive, wait for the next car. A thirty-second wait is always cheaper than an incident.
Elevator scenarios at a glance
| Situation | Recommended action | Why it works |
|---|---|---|
| Empty elevator, calm dog | Enter, position in corner, ask for sit | Builds the default habit |
| Elevator with one calm neighbor | Ask to join, stand between dog and person | Maintains a buffer zone |
| Elevator with another dog | Wait for next car unless both dogs are calm | Prevents confined-space conflict |
| Elevator with a child or stroller | Wait for next car or use stairs | Reduces risk in tight quarters |
| Your dog is already reactive in the car | Exit at the next floor, take stairs down | De-escalates before a lunge |
| Crowded car (4+ people) | Wait; crowded cars are not training environments | Avoids setting the dog up to fail |
Lobby, Mailroom, and Front Door: The Overlooked Zones
Most owners train hallways and elevators, then get caught out in the lobby. The lobby typically combines shiny floors, echoing acoustics, glass doors, and a constant stream of people — and it is where many dogs suddenly refuse to walk or start barking.
Treat the lobby as its own training station. Practice crossing it during quiet hours, reward your dog for walking on a loose leash across the shiny floor, and rehearse a “wait” at the front door before exiting. If your building has a package room or mailroom, add a quick “sit and wait” outside the door while you collect mail — this builds the habit of holding position in small, busy spaces.
Recovering From the Three Most Common Mistakes
Even with a plan, things go wrong. Here is how to recover without undoing your progress.
Mistake 1: Repeating “come” or “heel” while the dog ignores you in the hallway. Repeating a cue teaches the dog that the word is optional. Instead, stop moving, wait for the dog’s attention to return, then give the cue once and reward the correct response. If the dog will not respond, walk them back three steps and try again from a closer, calmer starting point.
Mistake 2: Apologizing to the neighbor and then scolding the dog. Scolding after the fact rarely connects to the behavior and tends to raise your dog’s arousal in a space that already stresses them. Keep your tone neutral, manage the situation with your body and leash, and address the training in a separate, calm session.
Mistake 3: Avoiding the elevator entirely after one bad ride. Avoidance feels safer but prevents the skill from developing. Go back to stationary-elevator practice, then short rides during quiet hours, and build back up over one to two weeks. If your dog’s elevator stress does not improve after consistent practice, that is a good point to consult a professional trainer or your veterinarian, especially if the distress looks like genuine fear rather than excitement.
A Two-Week Starter Plan
You do not need to fix everything at once. This sequence is designed to fit into normal daily walks.
Days 1–3: Threshold work only. Practice “wait” at your own door, five reps per exit, with the door closed and then slightly open. No hallway walking yet.
Days 4–7: Hallway positioning. Walk ten meters down the hall and back, keeping your dog on one side. Reward a loose leash every five steps. Do this during quiet hours.
Days 8–10: Neighbor passing. Ask a friend, family member, or willing neighbor to walk toward you in the hallway while you practice stepping aside and holding position. Three or four passes per session.
Days 11–14: Elevator rides during quiet hours. Start with a stationary car and doors held open, then short rides of one or two floors, then a full commute. Add lobby crossing practice on the same days.
By the end of two weeks, most dogs will show noticeably calmer hallway behavior. Some dogs need longer, particularly those with a history of reactivity — and that is normal, not a failure.
The Bottom Line
Apartment leash training is not about a stricter dog. It is about tighter routines, more deliberate positioning, and giving your dog clear, rehearsed behaviors for the specific spaces they walk through every day. The hallway, the elevator, and the lobby each have their own rules, and each one rewards a few minutes of structured practice far more than a longer walk outdoors.
Start today with one thing: pick your side, and practice the door threshold. Everything else builds from there.
Which part of your building gives your dog the most trouble — the hallway, the elevator, or the lobby? Note the specific moment things go wrong and what your dog does right before it, and you will have a clear starting point for the next training session. Related guides: Leash Training Your Dog to Walk Politely Around Distractions, How to Teach Heel Command to Your Dog: The Method That Builds Real Precision, and Teaching Recall to Your Dog: A Beginner Step-by-Step Tutorial.